A Weekend Camping in Pinnacles National Park

Bear Gulch Reservoir in Pinnacles National Park.
My Perspective
I'll admit it, I'm not a camper. The extent of my camping experience growing up was pitching a tent in my back yard to "play camping" and then heading into the house where my warm bed awaited me. Thanks, Mom.
As I've gotten older, camping now has a certain allure that I didn't crave as a kid. Life moves so quickly and we're all constantly on our phones or computers digesting information. When I'm in the woods camping, all of that goes away. My day is focused on hiking, cooking, reading and falling asleep to the stars.
Don't let me fool you, this is a recent discovery I made on my very first weekend camping trip...of my life. Yes, I'm turning 30 this year and somehow went that long without sleeping for a whole weekend in a tent. That all changed this year when my boyfriend, Daniel, and I spent the weekend camping in Pinnacles, our newest National Park.
In this post, I'm sharing my experience camping & exploring Pinnacles National Park. I'll tell you where to hike, what to pack and even share Daniel's Famous Campfire Quesadilla recipe.
xxA

These rock formations were formed from erupted volcanos over 20 million years ago.

Steep stairs on the High Peaks Trail.
Hiking
We woke up bright and early on Saturday morning and started boiling water for our coffee and oatmeal. Pinnacles is a popular hiking destination for both visitors staying on the campgrounds and those driving in for the day. We wanted to make sure we started the hike early so we could beat the crowds. We walked to the visitor center first to pick up a map, ask the ranger for advice and then took the shuttle to the Bear Gulch Trail Head. There are two caves that you can explore at Pinnacles and we asked for advice on which one to choose. Since we had all day and were starting before 10am, the ranger recommended we do both!
We had our bags packed with water, turkey/avo wraps, lots of snacks, sunscreen, bandaids and my camera. We were ready for an adventure.
We started at the Bear Gulch Trail Head which leads to the Bear Gulch Cave & Reservoir. Our hike down to the cave was easy and shaded. There were some gorgeous rock formations with hues of red and orange peeking out through the trees. We had to put our headlamps on when we entered the cave and even squeeze through some smaller crevices between rocks. I'll admit, it was pretty entertaining watching my 6'2 boyfriend crawling through a tiny rock tunnel.
After exiting the cave, we came across the reservoir and stopped for some snacks. The reservoir was gorgeous and because of our early start, we were the only ones there. From here, we took the Rim Trail to the High Peaks Trail. This hike was more challenging with very little shade, but the rock formations are worth it. The trail consisted of some really steep and narrow staircases, and at the very top there were Condors! We found a shady spot for lunch and watched them glide above the rocks.

We cut back at the Tunnel Trail to Juniper Canyon, and then took the Balconies Cave Trail to explore the second cave at Pinnacles. While the hike was long, there were gorgeous wildflowers along the way and the cave was well worth the trek. After exploring that a bit, we circled back along the Old Pinnacles Trailhead and back to the campground.
In total, we hiked over 10 miles and spent all day on the trails. My favorite part of the hike was definitely the High Peaks Trail. You can check out all of the trails and their distances here. We had to leave early on Sunday morning so saw as much as we could on Saturday, but you could also split the hike into two days and hike on Sunday as well.


A thistle above and California wildflowers below.


Eating
I was surprised at how much fun it was to plan out meals and cook together throughout our camping weekend. We made a list of what we'd eat and went to Trader Joe's to get all of the supplies. I'm sharing our meal plan with you and as a special bonus, Daniel's famous Campfire Quesadilla recipe.

Say goodbye to instant coffee on camping trips. This brew bag saved my life! Surprisingly, this post is not sponsored by Trader Joe's :).
Camping Meal Plan & Ingredients
Friday Night Dinner: Sausage & Vegetables
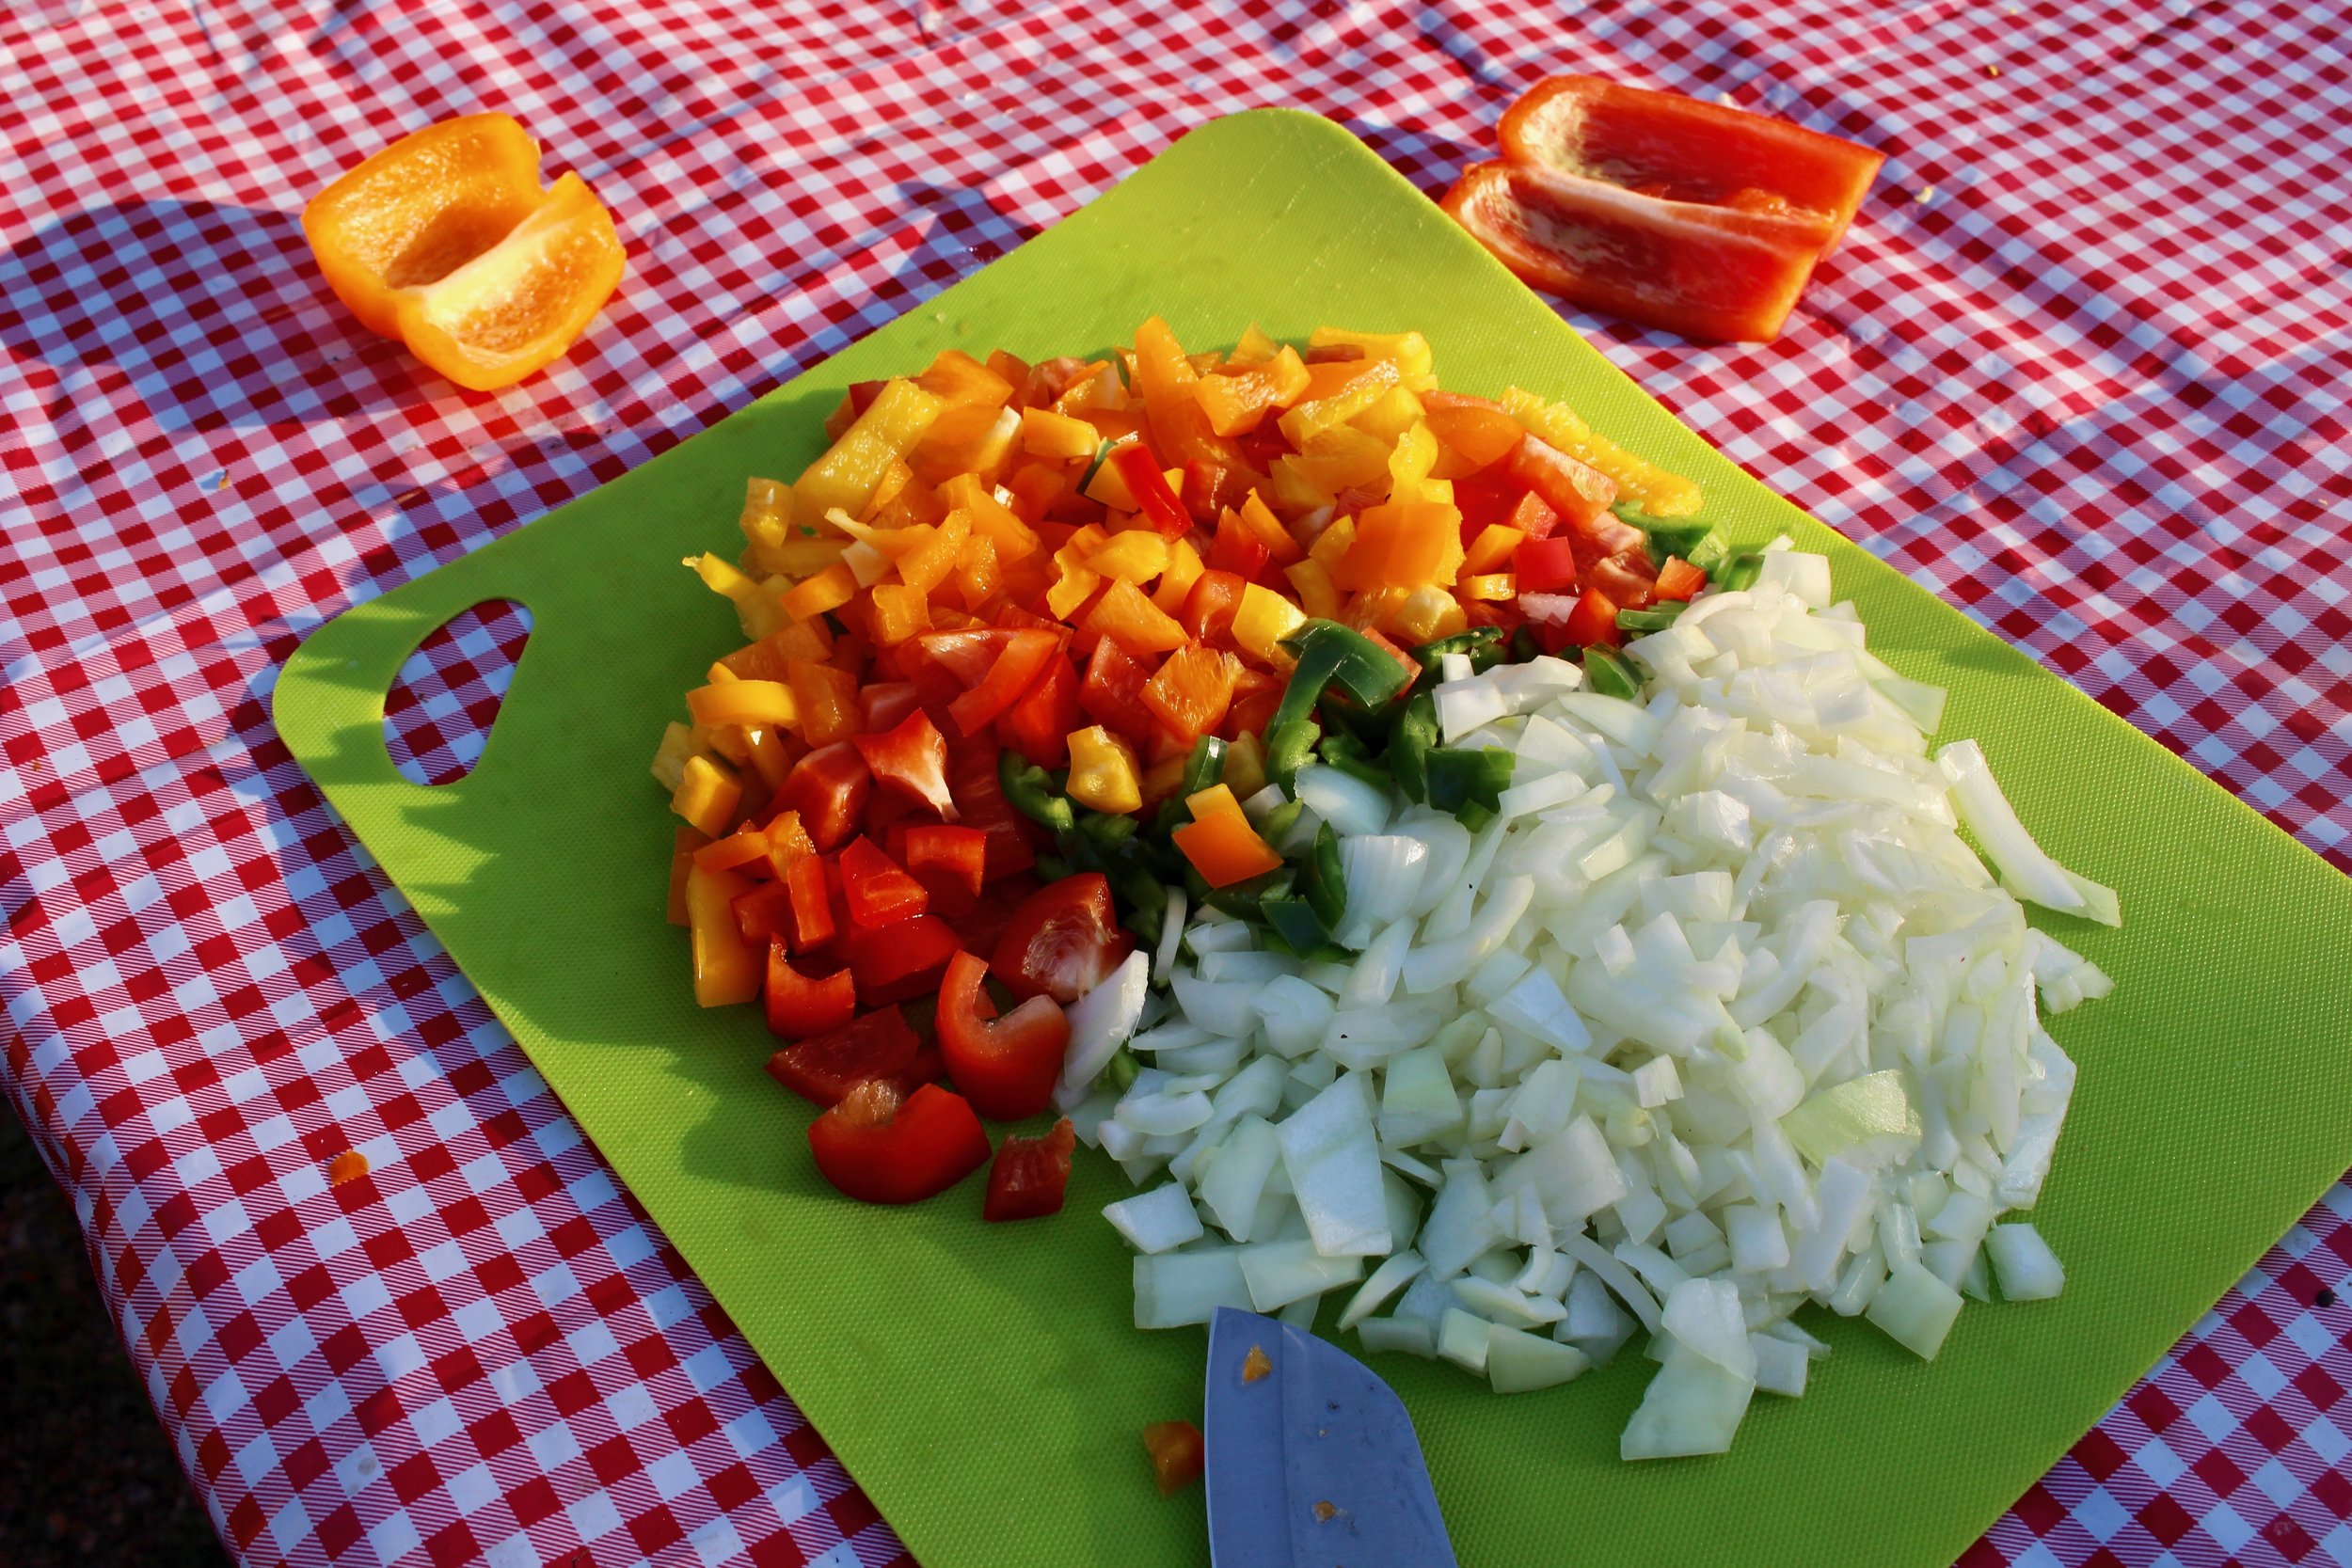
Precooked Sausage, Chopped Onions & Peppers, Salt & Pepper
Saturday & Sunday Breakfast: Coffee, Oatmeal, Bananas & Blueberries
2 TJ's Pour Over Coffee Brewer Bag, Oatmeal, 2 Bananas, Blueberries
Saturday Lunch (pack for the hike): Turkey & Avocado roll-ups
Large Tortilla Wraps, Sliced Turkey, 2 Avocados
Saturday Dinner: Daniel's famous Campfire Quesadillas
View detailed recipe below!
Dessert: S'mores (obviously)
Graham Crackers, 2 Hershey's Chocolate Bars, Bag of Marshmallows
Snacks & Drinks: Granola Bars, Fruit Strips, Trail Mix, Wine, Water & Coffee
What You'll Need

Matches
Large Cooler
Camping Stove
Camping Cookwear
Silverware & Spatula
Camping Mugs
Wine Opener
Marshmallow Roasting Sticks
Cooking Spray
Oven mitt
Paper Towels
Foil
Ice
Daniel's Famous Campfire Quesadillas
Ingredients (Feeds 4-6)
4 Chicken Thighs
Tortillas (use the leftovers from lunch)
Shredded Mexican Cheese
4 Ears of Corn (preferably with husks)
3 Bell Peppers
1 Jalapeño
1 Onion
Cilantro (optional)
Bacon (optional)
Salt & Pepper to taste

I recommend at least two people to help with this recipe. Enjoy some wine while you're cooking and play some campfire tunes!
Directions
Step 1: Build a roaring fire (you'll need a fire pit with a grill over it.) Set up the stove and coat two pans with cooking spray.
Step 2: Start with the corn because this takes longest to cook. Pull down the corn husks and add some butter, cover in tinfoil and place the corn on the grill over the fire. We forgot butter on our trip, so we actually wrapped the corn husks in bacon which turned out pretty well. I'll leave that up to you. The corn will take about 15-20 minutes and the kernels should be charred but not burnt.
Step 3: Cook the chicken in one pan and then set aside to cool a bit. Your sous chef can shred it after it cools and then cover it with foil.
Step 4: Dice onions & peppers, add salt & pepper and cook over the stove. Set aside in a bowl and cover with foil.
Step 5: When the corn is done, peel down the husks (pull off the bacon if you added it) and let cool. Once cooled, cut the kernals off the cob using a knife and set aside.
Step 6: Construct your quesadilla! Start with a tortilla and add a layer of veggies, chicken, corn and cheese to one half. Add some cilantro if you wish. Fold the quesadilla over and wrap in foil.
Step 7: Place your foil packet on top of the fire grill and cook both sides for about 1-2 minutes.
Step 8: Unwrap and enjoy!


Sleeping
My number one struggle with camping is sleeping in a tent. I love my warm, soft, fluffy bed and would much prefer that to a sleeping mat or airbed. When I decided to join my boyfriend on this adventure, I made an effort to design the most comfortable sleeping situation and I'm sharing my method with you.
1. A tent you can stand up in
2. An air mattress
3. A warm sleeping bag
4. An extra blanket
5. Real fluffy pillows
6. An eye mask
7. Earplugs
8. Wine
Set up the air mattress in the tent and include your favorite pillow, a sleeping bag and even an extra soft blanket. Sit by the camp fire and drink some whiskey or wine. The eye mask will allow you to sleep in after the sun comes out and the earplugs will keep out early morning animal noises.


TBP Insider Tips
> Tent & RV sites can be reserved 6 months in advance and group sites 12 months in advance. Make sure you have a reservation! You can make them at recreation.gov or call 877-444-6777.
> Pinnacles is only about a 2 hour drive south from San Francisco, so we left after work and arrived before dark to set up our tent. If you're flying from out of state, I'd recommend arriving to San Jose's airport and renting a car from there, which is only about 1.5 hours.
> Weekends are really busy during the Spring & Summer months. If you are driving into the park for the day instead of staying over night, try to arrive before 9am or earlier to get a parking spot.
> You can buy firewood that comes with a fire starter at the visitor center for $12. I recommend buying at least 2-3 bags if you're staying both nights.
> Check out any trail closures or safety notifications here.
> Bring sunscreen and a hat to keep yourself from getting burned. There isn't much shade as you get higher up on the mountain trails.
> Make sure you leave your shoes off when you enter the tent and always keep it closed so the critters stay out!
> While pets are allowed at the campground, they aren't permitted on the trails. @Maxtheterrier spent the weekend with a friend.
> Bring a headlamp and take it on the hike! The caves are dark and you'll need to turn it on for a short period of time as you navigate through. It's also great to have at night if you need to make a bathroom break. Luckily, Pinnacles has great bathroom facilities with flushing toilets.
> Bring boots or comfortable sneakers that you can hike in.
> Also pack: bug spray, wet wipes, toilet paper, hand sanitizer, your face cleansing wipes of choice and wilderness wipes.
Have you been to Pinnacles? What's the best camping trip you've ever taken? Leave comments below!
Link this post? Share it on Pinterest!


Spend a Weekend Exploring Laguna Beach, California.